
Are you tired of your camping trips turning into a tangled mess of tent poles and frustration? Well, fear not, fellow novice campers! We’re here to help you master the art of pitching a tent with style and a dash of humor. Now, I know what you’re thinking.
How To Pitch a Tent
“Pitching a tent? That sounds like something only seasoned outdoorsy folks do while sipping artisanal coffee brewed over a campfire.” But trust me, even the most experienced campers were once clueless beginners. We’ve all had our fair share of embarrassing tent mishaps, like setting up a lopsided tent that looked more like a sagging burrito than a cozy shelter.
But worry not! By the end of this article, you’ll be pitching tents like a pro, impressing your friends and family with your newfound tent-erecting skills. So, grab a cup of hot cocoa, get comfy, and let’s dive into the wonderful world of tent pitching. Now, you might be wondering, “Why is pitching a tent so important anyway?” Well, imagine this: you’ve embarked on an epic camping adventure, surrounded by breathtaking nature, only to find your tent collapsing like a house of cards in the middle of the night.
Not exactly the dreamy camping experience you had in mind, huh? Pitching a tent properly is the foundation for a successful camping trip. It ensures you have a sturdy and cozy shelter to retreat to after a day of hiking, swimming, and (let’s be honest) devouring marshmallows around the campfire.
Plus, mastering the art of tent pitching gives you an undeniable sense of accomplishment and a valuable life skill for future outdoor escapades. Now, before we dive into the nitty-gritty of tent pitching, I want to assure you that we’ll make this journey as fun and enjoyable as possible. Camping is all about embracing the adventure, even when things don’t go according to plan.
So, get ready for a sprinkle of humor, relatable anecdotes, and plenty of tips and tricks to set you on the path to tent-pitching glory.
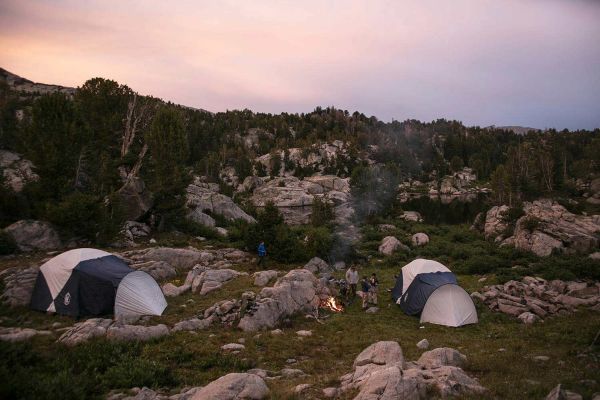
Selecting the Perfect Campsite
Picture this: you arrive at a campsite, eager to unleash your inner adventurer and set up your brand-new tent. You find what seems like a suitable spot, quickly unload your gear, and start pitching your tent with unwavering confidence. But little do you know, you’ve unwittingly chosen a location that could rival a rollercoaster ride in terms of its slope and lumpy ground. Suddenly, you’re spending the night sliding into the tent like a character in a slapstick comedy.
To avoid such hilarious (yet slightly uncomfortable) situations, let’s talk about selecting the perfect campsite. Here are a few things to consider:
Flat Ground is Your Friend: Look for a flat and level area to pitch your tent. Avoid slopes that could send you rolling downhill in the middle of the night or cause you to wake up feeling like a twisted pretzel. While the image of waking up with your head at the bottom of the tent and your feet at the top may seem amusing, trust me, it’s not the best recipe for a good night’s sleep.
Beware of Hazards: Keep an eye out for potential hazards that could turn your camping adventure into a comedy of errors. Steer clear of rocks that may create uncomfortable bumps under your sleeping pad and roots that can poke you in all the wrong places. And let’s not forget about anthills – no one wants to wake up covered in tiny, itchy critters who mistakenly believe you’ve invited them to an all-you-can-eat buffet.
Remember, finding the ideal campsite is like finding a needle in a haystack, except the needle is a cozy tent spot, and the haystack is a vast wilderness. But fear not, fellow adventurers! With a keen eye and a sprinkle of luck, you’ll discover the perfect piece of nature’s real estate for your tent. Oh, and before I forget, let me share a personal camping mishap. Once, in my eagerness to set up camp, I pitched my tent on what appeared to be a gentle slope.
Little did I know that the slope had a secret vendetta against me. As soon as I crawled into my tent, it was like participating in an impromptu Slip ‘N Slide competition. Lesson learned: always double-check the ground’s topography to avoid unintentional acrobatics in the middle of the night. So, dear novice campers, take a deep breath, put your scouting skills to the test, and find that perfect, flat piece of camping paradise. Your tent (and your sleep) will thank you for it.
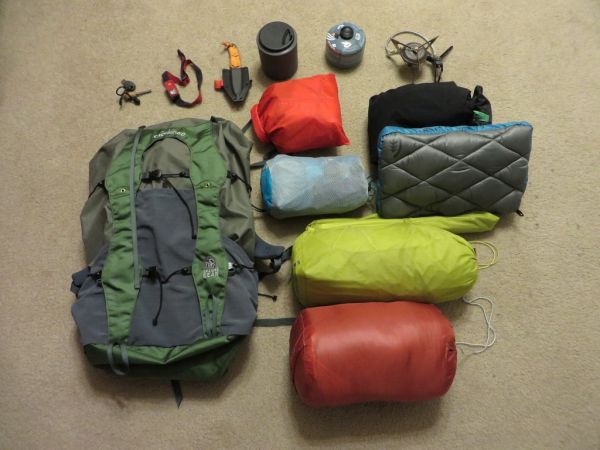
Gathering the Essential Tools
Congratulations! You’ve found the perfect campsite, and now it’s time to gather the essential tools for your tent-pitching adventure. Before we proceed, let me assure you that you won’t need a magical wand or a secret incantation (though a little wizardry wouldn’t hurt). Here’s what you’ll need:
The Tent: Ah, the star of the show! Make sure you have your tent ready to go. Remember to choose a tent that suits your camping needs, whether it’s a cozy two-person tent for a romantic getaway or a spacious family tent for a fun-filled group expedition. And don’t worry if you’re not sure how to transform that seemingly impossible bundle of fabric and poles into a fully functional shelter—we’ll tackle that in the next section.
Tent Stakes: These humble metal stakes are the unsung heroes of tent pitching. They keep your tent anchored to the ground, preventing it from taking flight during unexpected gusts of wind. Make sure you have enough stakes to secure each corner of your tent and perhaps a few extras in case some decide to go on a solo adventure and get lost in the wilderness.
Mallet or Rock: Now, let’s talk about driving those stakes into the ground. While you might be tempted to use your shoe or a flimsy twig, trust me when I say it’s best to have a mallet or a hefty rock at your disposal. They’ll save you from a potential toe-stubbing catastrophe and ensure your stakes are firmly planted.
Groundsheet/Tarp: Protecting your tent’s floor is essential for a comfortable and dry camping experience. A tarp on the ground acts as an additional layer between the tent floor and the ground. It prevents moisture from seeping in and helps extend the lifespan of your tent.
Plus, it’s like adding an extra cushion of protection against nature’s surprises—rocks, twigs, and whatever else lies beneath. Now, let’s address the elephant in the tent: the inevitable game of hide-and-seek with small objects like tent stakes. Trust me, I’ve had my fair share of playing detective in the wilderness, searching for those elusive stakes hiding in the grass or cunningly disguising themselves as part of a fallen branch.
It’s like they have a secret society where they gather to laugh at us confused campers. But fear not! Embrace the challenge, bring along a backup set of stakes, and be ready to engage in a battle of wits with these crafty little objects. So, gather your tent, stakes, mallet or rock, and groundsheet. Keep a close eye on those sneaky tent stakes, and let’s move on to the next section, where we’ll tackle the enigmatic world of tent assembly. Get ready to unleash your inner tent-pitching hero!
Unboxing and Familiarizing Yourself with the Tent

Congratulations, fearless tent-pitcher! You’re one step closer to becoming a master of the great outdoors. Now, it’s time to unbox your tent and acquaint yourself with its intricate details. Don’t worry if you feel a twinge of intimidation upon seeing a tangled mess of fabric and a puzzle of poles.
We’re here to guide you through the process with the grace of a gazelle (or at least the determination of a squirrel trying to crack a particularly stubborn nut).Lay It Out: Find a spacious area and lay out your tent components. Take a moment to appreciate the beauty of the design, the promise of adventure woven into every stitch. Ah, nature’s equivalent of a cozy cocoon!
Read the Instructions (or Wing It): Now, some adventurous souls might be tempted to toss the instructions to the wind and attempt an impromptu assembly. If that’s your style, go ahead, you wild spirit! But for those who prefer a more structured approach (or have a knack for getting themselves into tangled situations), give the instructions a quick read. Familiarize yourself with the tent’s anatomy, from the rainfly to the tent body, and take note of any specific assembly steps or quirks unique to your tent model.
Practice Makes Perfect: If time allows, consider doing a practice run of assembling your tent in the comfort of your own backyard. It’s like a dress rehearsal before the grand camping performance. Familiarize yourself with the process, learn the pole connections, and develop a sense of tent-pitching swagger. Plus, it’s an excellent opportunity to showcase your tent assembly skills to the neighborhood squirrels—no pressure.
Embrace the Tent Origami: Now, let’s tackle those poles! Some might say it’s like solving a Rubik’s Cube or mastering the art of origami. So, gather those bendy, twisty poles and start assembling. Remember, you’re in control. Don’t let those poles intimidate you. If you encounter a stubborn connection or a tricky bend, take a deep breath, channel your inner MacGyver, and tackle it with a can-do attitude. You’ve got this! Oh, and before I forget, let me share a little personal tale.
Once, during an epic camping adventure, I found myself struggling with tent poles that seemed to have a vendetta against me. It was like wrestling an octopus—each time I conquered one pole, another sprang to life, mocking my feeble attempts. But with a little persistence (and some colorful language that shall remain undisclosed), I emerged victorious. So, my dear tent-pitching comrades, remember that even in the face of tent-pole chaos, perseverance pays off. Embrace the challenge, laugh at the absurdity, and keep those tent poles in check.
Now that you’ve unboxed your tent and familiarized yourself with its inner workings, you’re ready for the grand tent-pitching extravaganza! In the next section, we’ll delve into the art of erecting your tent, transforming it from a tangled mess to a magnificent fortress of camping delight. Get your poles ready, and let’s make some magic happen!
Erecting the Tent
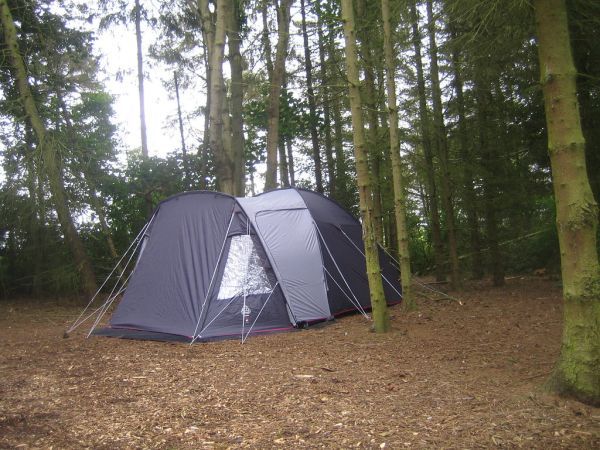
Congratulations, my intrepid tent-pitcher! It’s time to bring your shelter to life and transform that tangle of fabric and poles into a cozy home amidst the great outdoors. Prepare to channel your inner architect as we navigate the intricate process of tent assembly.
Stake Your Claim: Start by staking down the corners of your tent. Lay the tent out on the ground, aligning it with the previously selected flat and hazard-free spot. Then, secure each corner by inserting the tent stakes into the loops provided. Use your mallet or trusty rock to drive the stakes into the ground. Imagine you’re Thor summoning the power of Mjölnir, except instead of battling giants, you’re battling the forces of wind and gravity.
Pole Position: It’s time to tackle those tent poles like a seasoned pro. Begin by inserting the poles into their designated sleeves or grommets. Follow the instructions or the intuitive whispers of your camping instincts (whichever you prefer) to assemble each section of the pole. Connect them, one by one, until your tent structure starts to take shape. Be patient, my friend. The poles may put up a bit of resistance, but remember, you’re the boss here.
Raise the Roof: With the poles in place, it’s time to raise the roof—literally! Slowly lift the tent structure, guiding it upright. Feel the satisfaction as the tent walls rise, defying gravity and creating a haven from the elements. Marvel at your handiwork, but don’t get too lost in your triumph just yet. There’s still work to be done.
Adjust and Align: Once your tent is standing tall, it’s time to fine-tune its position. Make sure the tent is centered on your chosen spot, and adjust it until it’s perfectly aligned. Take a step back, observe your masterpiece, and let out a triumphant “ta-da!” You’re one step closer to camping bliss.
Oh, but the journey doesn’t end here, my friend. We still have a few finishing touches to complete. In the next section, we’ll explore how to properly secure the rainfly, attach guy lines for added stability, and ensure your tent is taut and level. It’s like adding the cherry on top of your camping sundae but with fewer calories and more satisfaction. So, grab a drink, bask in the glory of your erected tent, and get ready to conquer the final frontier of tent-pitching greatness. Onward we go!
Nailing the Finishing Touches
Ah, my fellow tent-pitching enthusiast, we’re in the home stretch now! With your tent standing tall and proud, it’s time to add those final touches that will elevate your camping experience from ordinary to extraordinary. Prepare to secure the rainfly, attach guy lines like a seasoned pro, and ensure your tent is as taut and level as a tightrope walker crossing the Grand Canyon.
Rainfly Mastery: The rainfly is your shield against the whims of Mother Nature. It’s like a superhero cape that protects your tent from rain, wind, and those pesky falling acorns. Carefully drape the rainfly over your tent, ensuring that it covers the entire structure. Attach it to the appropriate loops or hooks provided, securing it snugly in place. Remember, a well-secured rainfly is the key to a dry and cozy interior, and it also adds an extra layer of insulation on chilly nights.
Guy Lines for Stability: Ah, the guy lines—a tent’s secret weapon for maintaining stability in the face of gusty winds. Attach the guy lines to the designated loops on your rainfly, extending them outward and away from the tent. Secure them to nearby trees, stakes, or rocks, forming a sturdy web of support. Think of yourself as a spider, weaving a web of stability and ensuring your tent stands tall even in the face of swirling winds. Just don’t start dressing like Spider-Man—no need to scare off the woodland creatures.
Tautness and Levelness: Now, my meticulous friend, it’s time to ensure your tent is taut and level. A sagging or lopsided tent can lead to discomfort and potential rain puddles forming in unwanted places. Adjust the stakes and guy lines as needed, gently pulling to create tension and achieve that perfect balance. Take a step back, squint your eyes, and channel your inner perfectionist. You want your tent to be as straight and sturdy as your favorite shelf of perfectly aligned books (or your impeccably organized sock drawer).
Ah, the satisfaction of a well-pitched tent—it’s like the harmony of a perfectly roasted marshmallow and a graham cracker embracing a gooey chocolate square. Your tent stands as a testament to your triumph over the forces of nature and your newly honed tent-pitching skills.
But wait, my camping companion, our journey is not over yet. In the next section, we’ll address common tent-pitching challenges and share some troubleshooting advice. Because let’s face it, even the most experienced campers occasionally face twisted poles, loose stakes, or unexpected rain showers. So, gear up, my friend, and let’s prepare for the unexpected as we venture into the realm of tent-pitching mishaps and their ingenious solutions. Adventure awaits!
Troubleshooting and Common Mistakes

Ah, the great outdoors—where even the most carefully planned camping trips can encounter a few bumps in the road. But fear not, my resilient camper! In this section, we’ll tackle some common tent-pitching challenges and equip you with the knowledge to overcome them like a seasoned outdoorsy pro.
Twisted Poles, Begone!: It’s a classic camping conundrum—you’re excitedly assembling your tent, only to find yourself face-to-face with twisted poles that seem to have a mind of their own. Fear not, for there’s a simple solution! Gently untwist the misbehaving pole sections, realign them, and proceed with your assembly.
A little patience and a firm yet gentle touch should set those poles straight. Loose Stakes, No More!: So, you’ve diligently driven your stakes into the ground, only to find them wiggling like an overly enthusiastic jellyfish. This is a common issue, my friend, but it’s easily remedied.
Ensure you’re driving the stakes deep enough into the ground, ideally at a slight angle away from the tent. Give them an extra tap with your mallet or rock to secure them firmly. Remember, stakes that stand tall and proud are your allies against sudden gusts of wind. Unexpected Rain Showers: Ah, the whims of Mother Nature! You’re enjoying a sunny camping day when dark clouds suddenly roll in, threatening to unleash a torrential downpour. But worry not, because you’re prepared! Ensure your rainfly is properly attached and extends over the tent body, covering it completely.
Tighten the guy lines for extra tautness, allowing rainwater to slide off rather than pool on top of your tent. And always keep a stash of dry towels or extra clothing handy to tackle any unexpected leaks. Now, my fellow adventurers, let me share a humorous tale of my own camping blunder. Picture this: a serene evening in the wilderness, my tent standing tall, and the satisfaction of a successful pitch filling the air.
But as I nestled inside my cozy abode, raindrops started to fall. I quickly realized I had forgotten to attach the rainfly! So, I hastily donned my raincoat, braved the elements, and tried to secure the rainfly mid-downpour. Lesson learned: always double-check the rainfly before settling in unless you fancy an impromptu shower inside your tent. Remember, dear novice campers, the key to overcoming camping challenges is to approach them with a sense of adventure and a touch of humor.
Embrace the unexpected, share a laugh with your camping companions, and consider these mishaps as the anecdotes that make your camping experience unique. In the next section, we’ll wrap up our tent-pitching extravaganza by exploring the art of breaking down and packing your tent. So, stay tuned, my intrepid tent-pitcher, as we embark on the final leg of our camping adventure together.
Breaking Down and Packing the Tent
Alas, dear camper, all good things must come to an end, and so too must your camping escapade. But fear not, for with the end comes new beginnings, and with the breakdown of your tent, you’re one step closer to embarking on your next outdoor adventure. So, let’s dive into the art of breaking down and packing your trusty tent.
Disassemble with Care: Take a moment to bid farewell to your tent’s sturdy structure, knowing it served you well during your camping expedition. Start by removing the rainfly, carefully detaching it from the tent body. Fold it neatly and set it aside, ready to shield you from future rainstorms. Then, remove the tent stakes, making sure to gather every last one, including those sneaky escape artists hiding amidst the grass.
Pole Alignment: Ah, the poles—the backbone of your tent’s stability. Disassemble them section by section, taking care not to force any connections. Align them side by side, ensuring they’re free from any twists or tangles. Remember, you’re the puppet master of your tent poles, guiding them into their rightful places with grace and finesse.
Tent Origami: Now, my friend, it’s time to fold your tent with the precision of a seasoned origami artist. Start by collapsing the tent body, making sure to remove any dirt or debris. Follow the manufacturer’s instructions for folding or rolling the tent, usually starting from one end and working your way to the other. Embrace the challenge, my fellow camper, and envision yourself transforming the tent into a compact, neatly folded package. Who knew camping could be so artistic?
Storage Savvy: As you pack your tent, consider using a storage bag or sack specifically designed for tents. This will help protect your tent from any potential damage and keep it organized for your next outdoor escapade. And remember, my friend, never store your tent when it’s wet or damp. Allow it to dry completely to prevent unpleasant odors or the growth of unwanted guests (no, not the woodland creatures—mold and mildew). Now, let me share a cautionary tale.
Once, in my eagerness to wrap up a camping trip, I hastily folded my tent and crammed it into its storage bag. Oh, what a mistake! The next time I took it out, it resembled a rebellious self-folding transformer, refusing to take its proper shape. Lesson learned: take the time to fold your tent properly, ensuring it’s ready for action the next time you embark on a camping adventure.
And there you have it, my diligent tent-pitcher! Your tent is disassembled, folded, and ready to be stored until your next thrilling outdoor escapade. Take a moment to pat yourself on the back for mastering the art of tent pitching and breaking down with finesse.
In our final section, we’ll conclude our tent-pitching journey with a heartfelt reflection on the importance of embracing the adventure, acknowledging that even the most experienced campers were once novices too. So, my fellow camping enthusiast, let’s venture forth and bid adieu to this tent-pitching extravaganza!
Conclusion
Congratulations, dear novice camper, you have conquered the art of tent pitching! From selecting the perfect campsite to mastering the intricacies of poles and rainflies, you’ve transformed from a camping newbie to a tent-pitching virtuoso. As you bask in the glory of your newfound skills, let’s take a moment to reflect on this wild and whimsical journey.
Camping is more than just pitching a tent—it’s about embracing the adventure, immersing ourselves in nature’s beauty, and creating lasting memories. It’s about gazing at the star-filled sky, swapping stories around the campfire, and relishing the feeling of being part of something bigger than ourselves.
Remember, my fellow adventurer, that even the most experienced campers were once beginners too. We’ve all faced twisted poles, loose stakes, and unexpected rain showers. We’ve all fumbled through the tent origami and laughed at the comical moments that camping brings.
But with each camping trip, we learn, we adapt, and we grow, honing our skills and becoming one with the great outdoors. So, as you venture forth on future camping escapades, armed with your tent-pitching prowess, cherish the journey.
Embrace the challenges and unexpected moments with a dash of humor and a sense of adventure. Celebrate the victories, big and small, knowing that every camping mishap is just another tale to share around the campfire. And always remember, my camping companion, that nature has a way of humbling us and reminding us of its grandeur.
So, treat the wilderness with respect, leave no trace behind, and revel in the beauty that surrounds you. Now, my dear novice camper, it’s time to bid adieu to this tent-pitching extravaganza. I hope this article has provided you with the knowledge, confidence, and a touch of humor to embark on your own camping adventures.
May your future camping trips be filled with unforgettable moments, peaceful nights under the stars, and perfectly pitched tents that stand as symbols of your outdoor prowess. Go forth, my camping enthusiast, and conquer the wild with your tent-pitching skills! The great outdoors await, ready to embrace your adventurous spirit. Happy camping!


Leave A Comment