
Ever woken up on your last day of camping, looked around your formerly gleaming tent now decorated with a mix of mud splatters, leaves, and… is that a squirrel’s acorn stash? And then wondered, “How did it get to this?” Don’t worry, we’ve all been there, and I am here to tell you it’s okay. After all, a dirty tent is a sign of a good time! (Or so we tell ourselves to make it feel better…) That’s why we are going to show you how to clean a camping tent.
Welcome, brave souls, to the world of camping, where life is simple, the air is fresh, and the accommodations often look like they could use a good scrubbing. In this wild world, your tent is more than just a shelter – it’s your humble abode, your shield against nature’s caprices, and occasionally, a favorite hangout for woodland creatures. So, treating it with a bit of TLC goes a long way.
Sure, scrubbing off last season’s dried mud or battling with the dreaded mildew aroma may not be as thrilling as roasting marshmallows over an open fire. But trust me, as a seasoned camper and someone who’s made almost every tent-cleaning blunder possible; I can tell you that a clean tent is the secret sauce to happy camping. So, buckle up, campers, as we embark on this thrilling odyssey into the art and science of tent hygiene, or as I like to call it, “Zen and the Art of Tent Maintenance.” Remember, the journey of a thousand miles starts with a single… scrub.
Understanding Your Tent
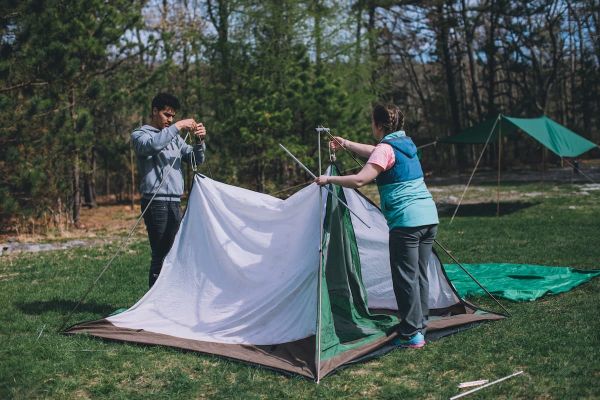
Before you roll up your sleeves and declare a cleaning war on your trusty tent, it’s worth taking a moment to appreciate the complexity of this outdoor marvel. I know, I know, it looks like a bunch of fabric held up by some poles, right? Well, remember when you thought your first microwave meal was just ‘heat and eat’, and then you ended up with a mini Chernobyl in your kitchen? Yeah, tents can be just as surprising.
The Tent Anatomy 101
The key to cleaning your tent effectively lies in understanding its basic structure.
- The Canopy – That’s the body of the tent. You know, the part that makes you feel like a medieval lord surveying his lands when you unzip it in the morning. The canopy is typically made of lightweight, breathable materials, which are ideal for a night under the stars but not so great when confronted with a vigorous scrubbing.
- The Rainfly – This is your tent’s superhero cape. It protects you from the elements, and most importantly, it ensures that you don’t wake up in a mini lake after an unexpected downpour. Like the canopy, it requires gentle care.
- The Groundsheet – The unsung hero of your tent, this tough guy takes the brunt of the dirt, rocks, and pine cones to keep you comfortable. But remember, tough doesn’t mean invincible. Too much vigorous cleaning, and you might find yourself getting a bit more familiar with Mother Earth than you’d like.
Types of Tents and Their Materials
Just as you wouldn’t toss a silk blouse in with your gym socks, understanding the types of tents and their materials can help you avoid a cleaning catastrophe.
- Nylon and Polyester Tents – These are like the seasoned backpackers of the tent world – tough, lightweight, and generally low maintenance. But that doesn’t mean you can go at them with a pressure washer!
- Canvas Tents – Think of them as the grand old dames of camping. They’re heavy and a bit high maintenance, but oh so comfortable. They need a gentler touch and more drying time to prevent mildew.
- Polycotton Tents – The Goldilocks of tents, these are a blend of cotton and polyester. They balance the best of both worlds but still require a delicate cleaning process.
By now, I hope you’re looking at your tent with newfound respect and a dash of apprehension. Fear not, brave camper! With a little know-how, the right tools, and a sense of humor, you’ll have your tent shining like a beacon of cleanliness amidst the great outdoors. Remember, a clean tent is a happy tent, and a happy tent makes for a happy camper. So let’s dig into the dirty details!
When To Clean Your Tent
Determining when to clean your tent can be as mysterious as figuring out the exact time to flip a pancake. Flip too early, and you’re left with a gooey mess. Too late, and you’ve got a charred lump. Similarly, clean your tent too often, and you risk damaging its protective layers. Wait too long, and, well… let’s just say that a tent shouldn’t have its own ecosystem.
The Occasional Cleaning
First things first, unlike your dishes, your tent doesn’t need to be cleaned after every use. It’s not a teenager’s room, but it’s also not your living room. The rule of thumb is that your tent should be cleaned occasionally, especially after a camping trip involving bad weather, lots of dirt, or if you accidentally turned it into a banquet hall for the local wildlife.
So, if you’ve just returned from a rather ‘earthy’ adventure, and your tent now sports an authentic dirt-camo pattern, congratulations! It’s time for a good cleaning.
Signs Your Tent Is Begging For A Bath
Sometimes, your tent might need a little TLC even if you haven’t just weathered a storm. Keep an eye out for these signs that your tent is trying to tell you something:
- The Smell Test – If opening your tent is reminiscent of a science experiment gone wrong, it’s probably high time for a clean.
- The Sight Test – Stains, spots, or visible dirt are your tent’s version of waving a white flag. It’s crying out for help, one grubby speck at a time.
- The Mold & Mildew Alert – This is the camping equivalent of a four-alarm fire. If you see or smell mold or mildew, it’s cleaning time ASAP! Not only are these fungal fiends bad for your tent, but they can also be harmful to your health.
- The ‘Nature Is Taking Over’ Warning – If you spot critters, bugs, leaves, or an intricate spider web worthy of Charlotte, then you’ve gone from camper to landlord. Time to evict these uninvited guests with a good scrub down.
Remember, tent cleaning is less about keeping up appearances (though nobody likes a grungy tent) and more about extending the life of your trusty shelter. So, the next time you’re back from an adventurous romp in the woods, give your tent a once-over. If it’s looking a bit sullen and smells like Bigfoot’s gym socks, you know what to do.
The Pre-cleaning Process
Alright, soldier! You’ve surveyed the battlefield, assessed the enemy (we mean the dirt, not the curious squirrel), and now it’s time to muster your cleaning armament and prepare for the fray. But remember, in the delicate art of tent hygiene, preparation is key. It’s a bit like preheating an oven – nobody really wants to do it, but dive in too soon and you’ll end up with half-baked results.
The Cleaning Checklist
Before we set sail on the sea of suds, here’s a quick checklist to ensure you have all your cleaning ducks in a row:
- Non-detergent Soap – This is the nectar of the cleaning gods. Steer clear of harsh detergents or dishwashing liquids, which can harm your tent’s water-resistance.
- Soft Sponge or Cloth – Something gentle to caress the dirt away, not a heavy-duty scrubber that’s going to declare war on your tent fabric.
- Warm Water – The Goldilocks of cleaning water. Not too hot, not too cold, just pleasantly lukewarm.
- A Large Tub or Bathtub – This will be your cleaning arena. Make sure it’s big enough for the tent to fit comfortably, and is also clean.
- Non-abrasive Brush – Handy for those stubborn spots, but remember, you’re not scrubbing a BBQ grill here.
- Spray Bottle (Optional) – Useful for spot cleaning. Plus, it’s always fun to spray things!
- Tent Seam Sealer – You’ll need this if the cleaning process affects your tent’s waterproofing.
Getting Down to Business
Now that you’ve gathered your gear, it’s time for some pre-cleaning action.
- Empty the Tent – Make sure to remove all the camping gear, the half-eaten granola bars, and the collection of pine cones your kid thought was a good idea. It’s easier to clean an empty tent, and less likely that you’ll find a soggy sleeping bag later.
- Gently Shake It Out – Before you submerge your tent into its warm bubble bath, give it a good shake outside. It’s like a pre-wash to get rid of loose dirt, leaves, and that family of spiders that decided to hitch a ride.
- Check for Damage – Look for any tears, holes, or frayed seams. These will need to be repaired after cleaning. It’s a bit like finding out you have spinach in your teeth – better to know now than later.
And there you have it, the pre-cleaning process in all its glory! Remember, slow and steady wins the race and a well-prepared tent cleaner is a successful tent cleaner. So, armed with your soap and sponge, onward to the battlefield… uh, bathtub. May the suds be ever in your favor.
Step-by-Step Guide to Cleaning Your Tent
Now that you’re prepped and primed, it’s time to dive into the grand cleaning adventure. Remember, cleaning your tent isn’t like scrubbing a kitchen floor. It’s more like washing a particularly fragile, oversized shirt that you live in… from time to time. So, without further ado, let’s make that tent shine!
Step 1: Fill Up The Tub
Start by filling your bathtub or large tub with lukewarm water. Make sure the water level is enough to completely submerge your tent. This is the part where you might feel like you’re preparing a giant soup. Resist the urge to add veggies.
Step 2: Add the Soap
Add your non-detergent soap to the water. Swish it around a bit to get those bubbles going. This isn’t the time for a bubble beard, though it might be tempting.
Step 3: Immerse Your Tent
Submerge your tent and rainfly in the soapy water. Be gentle, and make sure every part of the tent is thoroughly soaked. Pretend you’re giving an elephant a bath. Or maybe a hippo. Just remember, it’s a big, floppy, delicate animal.
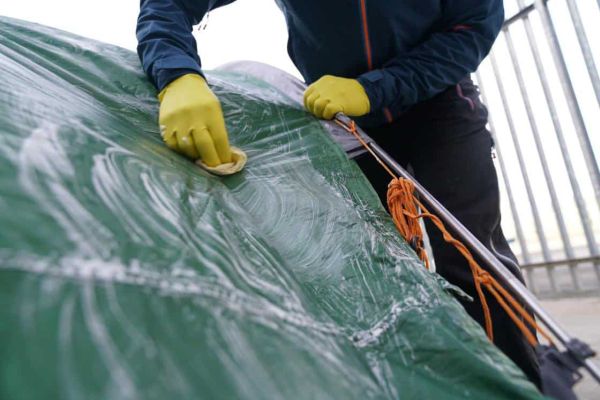
Step 4: Start The Scrubbing
Using your soft sponge or cloth, gently scrub the tent, focusing on particularly dirty areas. Remember, the aim here isn’t to erase your tent’s existence, but to coax the dirt away lovingly.
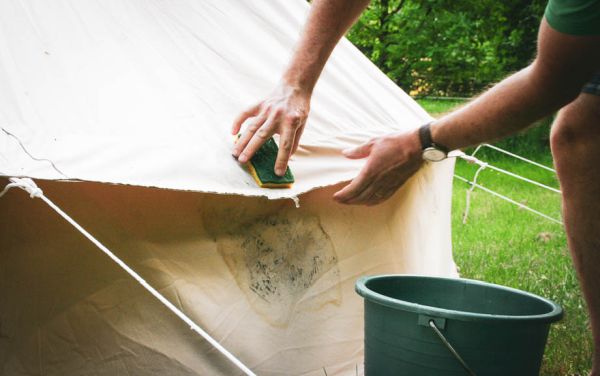
Step 5: Battle the Stubborn Stains
If some spots are resisting your gentle persuasion, use your non-abrasive brush to wage a slightly more aggressive campaign. But remember, we’re still in the ‘friendly nudge’ zone, not ‘scorched earth’ territory.
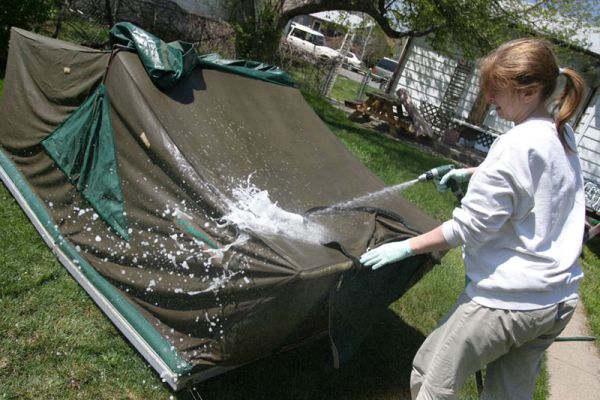
Step 6: Rinse Thoroughly
Once your tent is looking less like a mud wrestling champ and more like a place you’d happily sleep in, drain the soapy water and rinse your tent with clean, cool water. Rinse until all soap is gone because leftover soap can attract dirt faster than a donut shop attracts cops in a sitcom.
Step 7: Check for Grime Hideouts
Pay special attention to corners, crevices, and seams. Dirt likes to hide there like a sneaky ninja. And speaking of seams, if your tent seems to be less waterproof at the seams after cleaning, apply some seam sealer once the tent is dry.
Now, step back and admire your handiwork. You’ve successfully navigated the perilous path of tent cleaning and emerged victorious on the other side. But remember, it’s not over until the tent is dry, so let’s move on to that, shall we? But first, take a moment to high-five yourself. You’re doing great!
Drying Your Tent
Congratulations, intrepid cleaner! You’ve soaped, scrubbed, and rinsed your way to a sparkling tent. But hold your victory dance. It’s time for the drying process, a critical stage that separates the casual cleaners from the tent hygiene connoisseurs. Let’s take a quick tour down Drying Lane and uncover the best ways to avoid the curse of the Mold and Mildew Kingdom.
Air Drying: Nature’s Best Friend
The best and safest method to dry your tent is to air dry it. Simply hang it up or set it up in a shaded, well-ventilated area. Keep it away from direct sunlight as UV rays can damage the tent fabric faster than you can say ‘sunscreen.’
Sure, it’s slower than using a hairdryer or throwing it in the dryer with your socks, but remember – good things come to those who wait. And the good thing here is a tent that doesn’t smell like a swamp monster’s armpit.
The Do’s and Don’ts of Tent Drying
Here are a few important guidelines to make sure your tent drying experience doesn’t turn into a horror movie sequel:
- Don’t Rush It – It’s a bit like watching paint dry, except it’s your tent, and there are no paint fumes. Make sure your tent is completely dry, inside and out, before packing it away. Even a small amount of moisture can lead to mold and mildew. Remember, haste makes… a moldy tent.
- Do Check the Corners – Just as dirt loves to hide in corners and crevices, so does water. Give your tent a good shake (the fun part) and check all the nooks and crannies (the not-so-fun part) to ensure it’s completely dry.
- Don’t Use a Dryer or Direct Heat – Unless your idea of fun is a shrunken or melted tent, avoid using a dryer or any direct heat source to dry your tent.
- Do Take Care of the Zippers – Zippers can trap water, so make sure they’re open when drying your tent. And hey, while you’re at it, why not give them a quick clean with a soft brush?
- Don’t Pack It Away Wet – This can’t be stressed enough. A wet-packed tent is a petri dish for mold and mildew. And trust me, “Eau de Mildew” is not a perfume you want in your camping gear.
So, take a deep breath, grab a lemonade, and let nature do its thing. Drying your tent might not be the most thrilling part of your cleaning adventure, but it’s undoubtedly one of the most important. And when your tent is finally dry and ready to pack away, you can finally do your victory dance. Just make sure the tent isn’t still hanging up when you start busting those moves.
Storing Your Tent

Ah, the sweet taste of success! Your tent is clean, dry, and ready for its well-deserved rest. But before you pack it away like a forgotten toy in the attic, let’s talk about proper tent storage. After all, you want your trusty shelter to emerge from hibernation in top shape, ready to tackle your next camping adventure. So, let’s dive into the dos and don’ts of tent storage.
Dos of Tent Storage
- Clean and Dry – Ensure your tent is completely clean and dry before storing it. Lingering dirt or moisture can invite unwanted guests, like mold or that elusive woodland creature still seeking its acorn stash.
- Fold, Don’t Roll – When it comes to storing your tent, folding is the way to go. Rolling can create creases that may weaken the fabric over time. Follow the original folding pattern provided by the manufacturer or fold it loosely to prevent sharp creases.
- Avoid Compression – Don’t compress your tent too tightly when packing it away. Give it some breathing room to avoid unnecessary stress on the fabric and seams.
- Choose a Dry, Cool, and Dark Location – Find a storage spot that is dry, cool, and away from direct sunlight. UV rays can degrade tent materials over time. A dark corner of your basement or a dedicated camping gear storage area works well.
- Protective Bag or Container – Consider using a storage bag or container specifically designed for tents. These can provide additional protection against dust, pests, and accidental damage.
Don’ts of Tent Storage
- Don’t Store It Wet – Moisture is the sworn enemy of tent storage. A wet tent can lead to mildew, foul odors, and fabric deterioration. Ensure it’s thoroughly dry before putting it away.
- Avoid Attics or Basements with Moisture Issues – While the attic might seem like a convenient storage space, it can get hot and humid, which is a no-go for tent storage. Basements prone to leaks or excessive dampness should also be avoided.
- Steer Clear of Chemicals – Avoid storing your tent near chemicals, fuels, or strong-smelling substances. These can potentially damage the fabric and leave unwanted odors.
- No Hangers or Sharp Objects – Hanging a tent by its fabric or storing it near sharp objects can lead to tears, holes, and unnecessary heartache. Treat your tent with care and keep it away from potential hazards.
By following these storage guidelines, you’ll ensure that your tent remains in tip-top shape during its off-season slumber. Remember, a well-stored tent is a happy tent, and a happy tent means more memorable camping experiences in the future.
Now, go ahead and find that perfect storage spot for your trusty camping companion. But don’t be surprised if it occasionally whispers, “Take me on another adventure.” Tents have a way of bringing out the wanderlust in all of us.
Caring For Your Tent While Camping
Now that you’ve mastered the art of tent cleaning and storage, it’s time to level up your tent care game while you’re out in the wilderness. After all, prevention is better than a desperate cleaning mission when you return home. So, let’s explore some practical tips to keep your tent in tip-top shape during your camping escapades.
1. Site Selection
Choose your camping spot wisely to minimize potential risks to your tent. Look for a level and well-drained area, away from dead trees, rocks, or sharp objects that could puncture your tent. Avoid low-lying areas prone to collecting water during rain showers.
2. Use a Groundsheet
Using a groundsheet or footprint underneath your tent provides an extra layer of protection against rough terrain, sharp objects, and moisture. It helps prolong the lifespan of your tent’s floor and makes cleaning easier when you get back home.
3. Keep Your Tent Clean
While it’s impossible to keep your tent spotless during a camping trip, a little tidying up goes a long way. Shake off loose dirt, sweep away debris, and wipe down any muddy areas before entering your tent. This simple habit can help reduce the amount of dirt and grime that gets inside.
4. Establish a Shoe-Free Zone
Designate an area outside your tent as a “shoe-free zone.” Encourage everyone to remove their footwear before entering the tent to minimize the amount of dirt and moisture brought inside. Plus, it’s like an exclusive club where only clean socks are allowed.
5. Protect Your Tent from Rain
Rain can be both soothing and a test for your tent’s waterproofing prowess. To ensure your tent stays dry and cozy, make sure the rainfly is properly attached and taut. Pay attention to the seams and consider applying seam sealer before your trip to reinforce its water resistance.
6. Ventilate Your Tent
Proper ventilation is crucial to prevent condensation buildup inside your tent, which can lead to dampness and mold. Keep the tent’s windows or vents open, even during mild weather, to promote air circulation. Just make sure unwanted critters don’t sneak in while you’re at it.
7. No Food Inside the Tent
As tempting as it may be to have a midnight snack fest inside your tent, resist the temptation. Food attracts curious critters, bugs, and potentially larger visitors who have an insatiable appetite for your granola bars. Store food and scented items securely in designated containers or bear-proof canisters away from the tent.
8. Address Spills and Stains Promptly
Accidents happen, and spills or stains are inevitable. When mishaps occur, tackle them promptly with a mild soap and water solution. The sooner you address the stains, the easier they are to remove.
By implementing these tent care practices during your camping adventures, you’ll ensure that your tent remains a clean and comfortable haven amidst the great outdoors. Plus, a well-cared-for tent is like a trusty companion, always ready for the next adventure with you.
So, fellow campers, take care of your tent, and your tent will take care of you. Happy camping!
Conclusion
Congratulations, novice campers turned tent-cleaning aficionados! You’ve journeyed through the realms of tent hygiene, armed with humor, helpful tips, and a touch of adventure. From understanding your tent’s anatomy to mastering the art of cleaning, drying, and storage, you’ve become the guardians of clean camping abodes.
Remember, while the great outdoors can be messy and unpredictable, a clean tent is your oasis amidst the wilderness. It not only prolongs the life of your beloved shelter but also ensures a more pleasant camping experience. Plus, it’s a great excuse to show off your impressive cleaning skills to fellow campers (you know, while sipping on a cup of campfire coffee).
So, as you embark on your future camping endeavors, let tent care be an integral part of your outdoor routine. Embrace the occasional dirt and the unexpected challenges, but also embrace the satisfaction of a well-maintained tent at the end of each adventure.
As the saying goes, “A clean tent is a happy tent and a happy tent makes for a happy camper.” May your camping trips be filled with laughter, breathtaking views, and tents that sparkle like the North Star.
Now, go forth, brave campers, and let the cleanliness of your tent become the envy of all who roam the campgrounds!


Leave A Comment