Whoever said, “Sleeping under the stars sounds dreamy,” clearly forgot to mention the rocks, creepy crawlies, and the perpetual fear of becoming a burrito for the local bear. If you’re new to camping, you might have wondered how such an idyllic adventure could feel like a knight’s sleep on a medieval torture rack.
Here’s the truth, dear camper-to-be, your dream of a peaceful night in the great outdoors isn’t just a pipe dream – it’s all about the humble camping cot. Just like your bed at home, your camping cot is more than a place to count sheep (or in your case, probably owls). It’s your cozy nook in the heart of nature, a little slice of home amidst the wilderness, and trust us, you want it to be as comfortable as possible.
In this article, we’ll dive into the adventurous journey of how to make camping cots comfortable. From setting it up without losing your cool to keeping the bugs at bay (unless you fancy a midnight mosquito party), we’re here to guide you step-by-step.
So buckle up, put on your imaginary scout hat, and let’s conquer the wild (well, at least the wild that is your camping cot). By the end of this article, you’ll be all set to snooze in comfort, surrounded by the whispering trees and the gentle melody of the crickets. Sleep tight and don’t let the bed bugs (or any other bugs for that matter) bite!
Unboxing Your Camping Cot
So, you’ve got your shiny new camping cot, and it’s sitting in a box, filled with promises of blissful nights under the starlit sky. As you pop open the box, you can almost hear the drumroll in the background (or is that just your heartbeat escalating?).
There’s a multitude of camping cot types out there. From ultralight cots for the backpackers who count every ounce, to luxurious padded ones for glampers that would make a sultan green with envy, there’s a cot for every camper. And yes, each comes with its own set of features, mysterious parts, and setup instructions that could easily pass for an advanced cryptography lesson.
But fret not! Here’s your humorous guide on how to assemble your cot without becoming a contestant in a wilderness wrestling match.
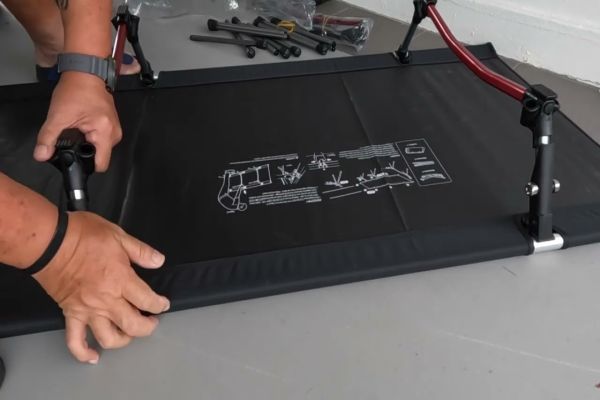
- Read the instructions. Yes, you heard it right. No matter how intuitive you believe you are or how many Swedish furniture you’ve battled with, don’t skip this step.
- Lay out all the parts on an even ground, sort of like a crime scene investigation but without the grim part. This way, you’ll get an overview of what you’re dealing with.
- Follow the instructions, step by step. This is not the time to unleash your inner rebel. Remember, the wilderness is wild enough already, you don’t need a rogue camping cot.
- Once it’s assembled, give it a good test. Sit, lay down, roll over (not off, please). Better to have a cot malfunction now than in the middle of a dream where you’re sipping pina coladas on a beach.
Alright, now that your camping cot is set up, it’s essential to position it on even ground. Because nobody enjoys the surprise of rolling off their cot in the middle of the night, or worse, finding out they’ve been slowly sliding into their neighbor’s space.
Next up, we’ll discuss the linchpin of your cot’s comfort – the mattress. Remember, the key to sweet dreams is a great mattress, not counting those pesky mosquitoes!
Investing in A Good Mattress or Topper

Ever woke up from a camping trip feeling like you’ve been part of an all-night wrestling match with a grizzly bear, and lost? If you’ve nodded a fervent ‘yes’, then chances are, your mattress is to blame.
A mattress or topper for your camping cot is like the secret sauce in your grandma’s legendary stew. It’s the difference between waking up feeling fresh as a daisy or as if you’ve participated in a medieval jousting tournament. Let’s explore how to pick the perfect one for your camping adventures.
- The Goldilocks Principle: When it comes to camping mattresses or toppers, the key is finding a balance between comfort, thickness, and portability. You want a mattress that’s not too hard, not too soft, but just right for your back and sleep posture.
- Foam vs Air: Foam pads offer decent insulation and comfort at an affordable price. However, they might be a bit bulky. Air pads, on the other hand, are lightweight and compact but can be punctured. Your choice would depend on your camping style. For instance, if you are hiking to the campsite, an air pad might be a better choice for its weight and portability.
- Insulation is Key: Consider the R-value of the mattress or topper. It measures the material’s ability to insulate you from the cold ground. Higher R-values mean better insulation. You wouldn’t want your back to feel like a popsicle at midnight, would you?
Now, a good mattress or topper is a half-won battle. But to ensure its longevity, you need to care for it. Keep it clean, store it properly, and it will serve you well. Remember, a happy mattress equals a happy camper.
Ready for the next lesson? We’ll be tackling the big, cold problem of “Chilly Back Syndrome”. Let’s dive into the warmth and insulation tips to keep the cold at bay (and not just with bear hugs). So don’t get cold feet (or back), and read on!
Importance of Warmth and Insulation
Let’s talk about an infamous condition that’s as common among campers as misplaced marshmallows – the “Chilly Back Syndrome.” You know, when you’re trying to catch some z’s, and your back suddenly feels like it’s part of an arctic expedition? That’s because, in the camping world, warmth escapes faster than a squirrel that just stole your last granola bar.
Here’s how to keep your backside toasty and fend off the dreaded icy back:
- Master the Art of Layering: Just like how you’d layer a hot dog (bun, dog, condiments, and no, not the literal ‘dog’), layering your cot is essential for insulation. The mattress or topper forms the base, add a blanket or sleeping bag on top, and voila! You’ve just created your cozy, warmth-trapping nest.
- Choose the Right Sleeping Bag: Your camping cot is like a superhero and your sleeping bag, its sidekick. Together, they fight the evil Cold Lord. Ensure your sleeping bag is suitable for the temperatures you will be camping in. A bag that’s rated for colder temperatures than you expect to encounter is a safe bet.
- Consider a Cot Heater: For those particularly frosty nights, a portable cot heater can be your warm, reassuring friend. However, safety first! Ensure it’s specifically designed for tent or outdoor use, and always follow the instructions.
- Go for Insulated Blankets: An insulated blanket can work wonders on a cold night. They’re like your mom’s hugs, but portable and non-embarrassing when you’re with your friends.
Remember, staying warm doesn’t mean you have to bundle up like a mummy. Overheating can disrupt your sleep just as much as the cold can. So, adjust your layers as per your comfort and the outside temperature.
Up next, we’ll dive into how to keep your cot a bug-free zone. Unless, of course, you find the prospect of waking up covered in bug bites oddly thrilling. So keep scrolling unless you’re looking to become a midnight snack!
Considering Bug Nets and Tent Options
Now, who doesn’t love a good midnight party, right? But when your bash involves bugs doing the cha-cha on your face, it’s probably not the kind of shindig you were hoping for. In the great outdoors, your camping cot can become the hottest club in town for every insect with wings, legs, or any combination thereof.
Don’t fret, though; we’ve got a few tricks up our sleeve to keep your cot a bug-free sanctuary:
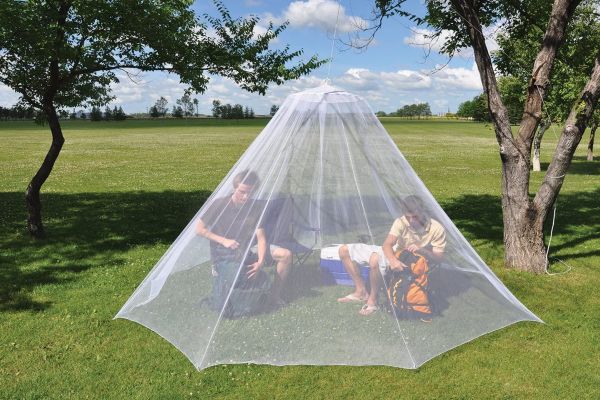
- Bug Nets – Your Cot’s Invisible Shield: A bug net is like an invisible force field that keeps the buzzing critters at bay. Ensure it’s large enough to cover your entire cot and suspend it well so it doesn’t drape directly onto you. You don’t want the mosquitoes whispering sweet nothings in your ear, do you?
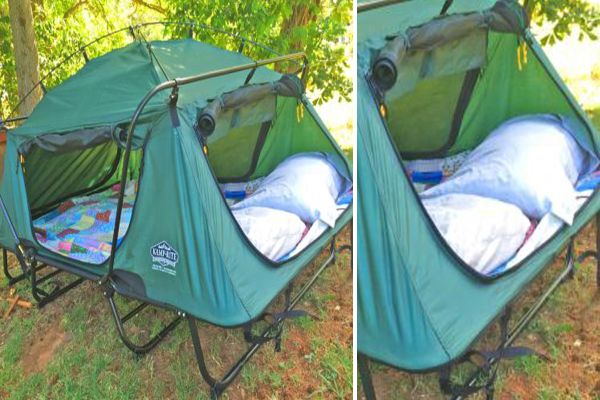
- Tents for the Win: If you prefer a fortress of solitude over a force field, a tent might be your best bet. Besides providing privacy and protection from the elements, tents also serve as an excellent deterrent for bugs. Just ensure your tent is well-ventilated, or you might wake up in a sauna.
- The Time-Tested Method – Insect Repellent: A good insect repellent can discourage bugs from treating you like a midnight buffet. Opt for skin-friendly and environment-friendly options. But remember, your favorite perfume might smell like an open invitation to the bug party.
- Location, Location, Location: Avoid setting up your cot near stagnant water or damp areas, which are essentially bug metropolises. Unless you’re an aspiring entomologist, it’s best to steer clear.
Remember, a bug-free cot equals a bite-free you. That’s not just a nifty rhyme; it’s a mantra for a peaceful night’s sleep under the stars.
Next, we’ll journey into the realm of customization, where your camping cot goes from “meh” to “magnificent!” Get ready to give your camping cot the spa treatment it deserves.
Customizing Your Camping Cot for Ultimate Comfort
Welcome to Cot Comfort 2.0 – where we give your humble camping cot the royal treatment it deserves. After all, who said you can’t enjoy a sprinkle of luxury in the wild? By adding a few personal touches, your cot can transform from a mere sleeping platform to a dreamy escape.
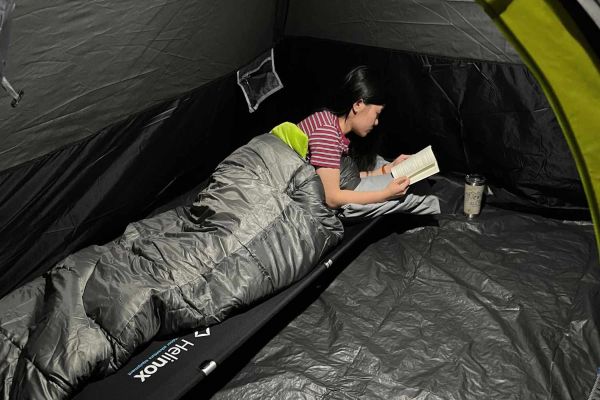
- Pillow Talk: A good pillow is like the cherry on top of a sundae. Just because you’re out in the woods doesn’t mean you should compromise on neck support. Opt for a camping pillow that’s compact yet comfy. In a pinch? A bundled-up hoodie or your sleeping bag’s stuff sack filled with clothes can do the trick!
- Supports and Extra Padding: If you’re someone who enjoys sleeping on a fluffy cloud, consider adding extra padding or supports to your cot. An extra foam pad or inflatable mattress can make your cot feel more like your bed at home. Just remember, balance is key – you don’t want your cot to turn into a marshmallow.
- Comfort Essentials: Your cot is your personal space, your little corner of comfort in the great outdoors. Make it more ‘you’ by adding elements that bring you joy and relaxation. It could be a favorite book, a cozy hoodie, an eye mask, or even a string of fairy lights (for that touch of magic).
Remember the golden rule of camping cot customization: comfort is subjective. Your super-soft, plush topper might be another camper’s backache trigger. So, know what makes you comfortable and personalize accordingly.
Alright, it’s time for a little pop quiz: where’s the best place to test your newly customized cot? If you said “at home,” give yourself a pat on the back. In the next section, we’ll delve into why the comfort of your living room is the perfect testing ground for your camping cot setup.
The Importance of Trying Your Setup at Home First
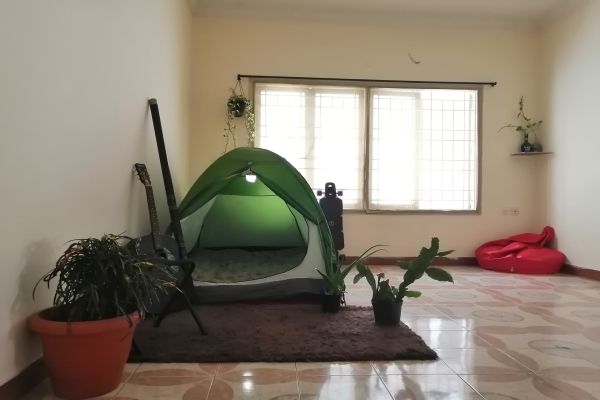
Let’s take a brief detour into the land of cautionary tales. Picture this: After hours of hiking, you finally reach the picture-perfect campsite. The stars are twinkling, and the campfire’s crackling. You can’t wait to dive into your newly customized camping cot, only to realize… you have no idea how to set it up, or worse, a vital part is missing.
This, dear reader, is what we call a ‘camping catastrophe’. However, it’s easily avoidable by doing a ‘dry run’ at home.
- Setup Practice: Assemble your camping cot complete with its customizations. Familiarize yourself with the process so you could probably do it with your eyes closed (though we don’t recommend that).
- Sleep Test: Try sleeping on your cot for a night. If you wake up feeling like you’ve spent the night rolling around on a field of rocks, it might be time for some adjustments.
- Packing It Up: Practice disassembling and packing up your cot. You’ll thank yourself when you’re doing it for real, surrounded by nature and a dozen curious squirrels.
Taking the time to do a trial run at home can mean the difference between a restful night under the stars and a restless nightmare. So, make sure you’re not just camp-ready, but also cot-comfort-ready!
In our concluding section, we’ll summarize your journey from camping cot newbie to cot comfort maestro. Let’s bring it home (or should we say, bring it to the campsite!).
How to Make Camping Cots Comfortable Conclusion
Congratulations, you’ve graduated from our Camping Cot Comfort Academy, ready to venture into the wilderness with a cot setup that would make even the hardiest camping veterans a little bit jealous. You’ve learned how to assemble a cot without shedding tears (or sweat), how to layer it like a boss to fend off the cold, and how to keep those pesky bugs from hosting their midnight jamboree on your face.
More than that, you’ve personalized your cot to be a reflection of your comfort, turning it from a mere sleeping platform into your cozy, personal haven amidst nature. You’ve even aced the art of at-home trial runs (we hope your living room didn’t protest too much).
But the journey doesn’t end here, brave camper. Every camping trip is an opportunity to fine-tune your cot setup, to learn a little more about your comfort needs, and to discover new ways to make your nights under the stars even more delightful.
So go ahead, step into the embrace of the great outdoors. Let the symphony of the night lull you to sleep on your incredibly comfortable cot. After all, it’s not just about surviving the night in the wilderness but about thriving, about experiencing the magic of the night in the heart of nature, in the heart of comfort.
Happy camping, cot comfort maestro! Now, if only we could teach the bears to stop sniffing around our s’mores…
Remember, the key to a great camping experience is preparation and the willingness to adapt and learn. Happy trails and restful nights to you, dear camper!


Leave A Comment