
Remember that time you decided to fully embrace the rugged outdoorsman (or outdoorswoman) persona, bought the perfect camping gear, packed the marshmallows, and headed for the wilderness? You found the perfect spot, ready to conquer nature… until you reached for your brand spanking new camping knife to cut a piece of cord and realized it was as blunt as a butter knife at a steak dinner. Sound familiar? Well, you’re in the right place! In this article, we’re not just going to save your dignity; we’re going to save your camping trip and teach you how to sharpen a camping knife.
A camping knife is as crucial to an outdoor adventurer as a paddle is to a canoeist. Without it, you’re left up the creek, and trust me, you do not want to be in that situation. For the inexperienced camper, the idea of sharpening a knife can seem as daunting as wrestling a bear. But, fear not! We’re going to guide you through this process with the same ease as a knife (a sharp one, of course!) glides through soft butter.
Now, while we all love a good laugh, let’s be clear: this isn’t going to be one of those highfalutin articles that assume you’ve got a black belt in blade sharpening. Nor will it have you using mysterious devices that look more like medieval torture tools than anything else. We’re going simple, easy, and hilarious (because if you can’t find the funny in camping, you’re doing it wrong).
Ready to transform your dull camping knife into the outdoor tool of your dreams? Great! Grab a seat (ideally, not on a tree stump—unless that’s your thing), read on, and let’s get the point back on that blade!
What You Need for Knife Sharpening
Sharpening a knife is somewhat similar to dressing for the outdoors – you need the right gear. In the case of knife sharpening, you’re going to need a couple of tools. And no, despite your creative instincts, your roommate’s nail file or the edge of a concrete block won’t cut it (pun intended!).
Here’s what you’ll need
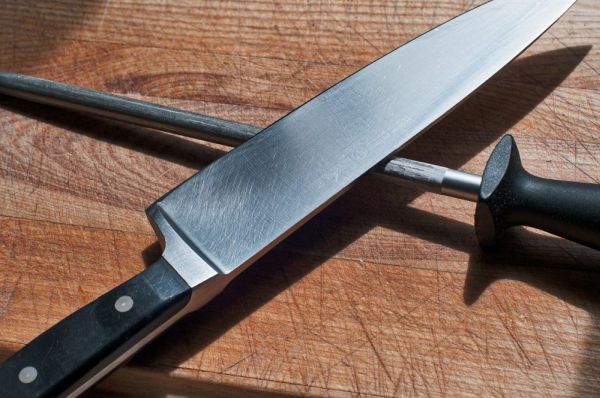
A Sharpening Stone: Also known as a whetstone, this is your main tool for getting that blade nice and sharp. These come in various grits, just like your favorite sandpaper (everyone has a favorite type of sandpaper, right?). A lower number indicates a coarser stone, which is great for seriously blunt knives. A higher number is for fine-tuning that edge.
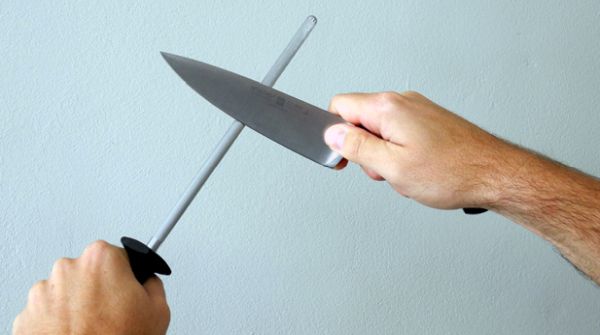
Honing Rod: This tool is like the cherry on top of your knife-sharpening sundae. After sharpening your knife on the stone, a honing rod helps to realign the edge and keep it razor-sharp for longer.
A Damp Cloth: This is for wiping the blade clean after you’ve worked your magic on it. Plus, it’s handy for cleaning up any mess you’ve made during the sharpening process.
Knife Oil (optional): Knife oil can be used on the stone during the sharpening process, especially if you have an oilstone. It’s like giving your knife a luxurious spa day. But remember, we’re here for sharpness, not knife pampering. If you don’t have knife oil, water will work just fine.
These tools are relatively straightforward and easy to handle, just like a TV remote… unless you’re one of those people who still can’t figure out how to use their TV remote (if that’s you, good luck out there in the wilderness!).
Now that you’re equipped with the right tools let’s learn a little more about the star of the show – your camping knife!
Understanding Your Knife
Before we jump into the sharpening process, let’s take a moment to get to know your camping knife a little better. It’s like going on a first date, minus the awkward small talk and the overpriced coffee.
Camping knives come in various shapes and sizes, each with their unique purpose. Some are designed for slicing, some for chopping, and some for fighting off zombies in an apocalyptic scenario (just kidding, don’t take your horror movie cues from this guide!).
Here are a few types you might come across
Fixed-Blade Knife: The macho-man of the camping knife world. Sturdy, reliable, and great for heavy-duty tasks like splitting firewood. It’s like the Dwayne “The Rock” Johnson of knives.
Folding Knife: These are the compact, easy-to-carry options. They’re great for light-duty tasks like food preparation or cutting cords. It’s the MacGyver of knives, always ready to spring into action when needed.
Swiss Army Knife: The multi-tool maestro. Besides a knife, they have everything from screwdrivers to bottle openers. It’s like the entire cast of “The Avengers” in your pocket.
Survival Knife: The Bear Grylls-approved option. These are versatile and often come with added survival tools like a firestarter. But remember, drinking your own… you know what, never mind. Let’s stick to sharpening.
We should clarify, though. Those big, monstrous blades you often see in action movies? Yeah, they might look cool, but they’re usually overkill for a typical camping trip. Unless you’re planning to single-handedly fell a Redwood or duel Bigfoot, a modest-sized, sharp camping knife should do the trick.
Now, armed with your knife knowledge (or ‘kn-knowledge’, if you like word mashups), you’re ready to start sharpening! Let’s dive in. Just remember, we’re sharpening knives here, not stakes to fight off vampires. Not unless your camping trip took a really odd turn…
Sharpening the Camping Knife: Step-by-step Guide
Time to get down to the nitty-gritty. Don’t worry, we’re not expecting you to suddenly morph into a knife-sharpening ninja. Although, if that does happen, please send us video proof.
Safety First!
Before we begin, it’s essential to remember safety. We want to sharpen your knife, not your fingers. So, kids, don’t try this at home. Or rather, do try this at home, but not without adult supervision. And adults, be more adult-like.
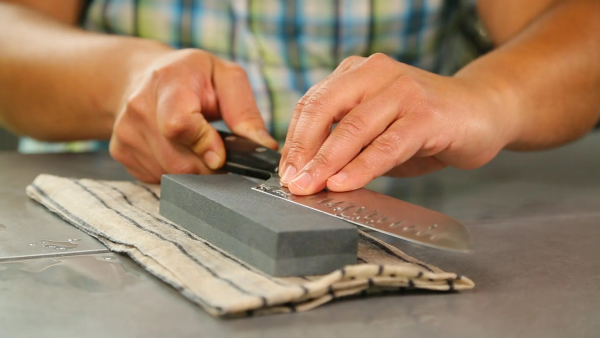
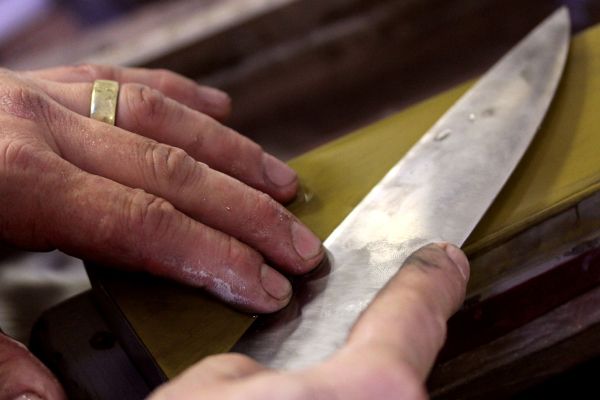
Step 1: Prep Your Stone
Soak your sharpening stone in water for about 5-10 minutes until it’s thoroughly saturated. This is to prevent the stone from soaking up your tears when you realize sharpening a knife isn’t as easy as sharpening a pencil.
Step 2: Find the Angle
Hold the blade at an angle of approximately 20 degrees to the stone. If you’re geometry-challenged (like most of us), that’s about the thickness of three stacked coins.
Step 3: Sharpening Time
With moderate pressure, slide the blade across the stone, from the heel of the blade to the tip, while maintaining that 20-degree angle. It’s a bit like trying to pet a very small and flat cat, if that helps.
Step 4: Flip and Repeat
After you’ve made several passes, flip the knife over and repeat the process. Yes, your knife has two sides. It’s not playing favorites, and neither should you.
Step 5: Time for the Rod
Once you’re satisfied with the sharpness of your knife, it’s time to bring in the honing rod. Hold the blade against the rod at the same 20-degree angle and slide it along the rod from the heel to the tip.
Step 6: The Final Wipe
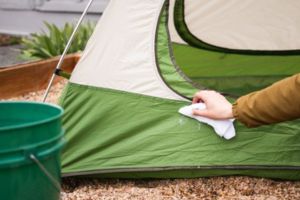
Give your knife a good wipe-down with the damp cloth. Make sure it’s clean and dry to prevent any rust. This is your knife’s equivalent of a spa day, complete with a full-body cleanse.
Remember, sharpening a knife is not a form of therapy. Overzealous sharpening won’t solve your problems, but it might create new ones. Like a knife that’s so thin it could audition for a role in a Tim Burton movie.
And that’s it! You’ve officially sharpened your knife. But don’t rush off to cut anything just yet. The next section is all about testing your knife’s sharpness. Don’t worry, it doesn’t involve any fingers.
Testing Your Knife

So, you’ve wrestled with your knife and stone, and you’re pretty sure you’ve emerged victorious. But how can you really tell if your knife is sharp enough? Well, don’t start by testing it on your thumb! Safety first, remember? Here are some safer methods:
The Paper Test: Find a piece of paper (a bill you don’t want to pay might do nicely), hold it up, and try to slice down through it with your knife. If the knife cuts through the paper cleanly, congratulations! If it just sort of thuds against the paper, leaving a pitiful dent, back to the stone with you!
The Tomato Test: Got a ripe tomato lying around? Try slicing it. A sharp knife should cut through the skin effortlessly without squishing the tomato. And voila, you’ve got the start of a campfire salad!
The Shaving Test: Very carefully, try to shave a small patch of hair off your arm. If it shaves the hair cleanly, your knife is sharp. If it just sort of nudges the hair around, well, your knife isn’t quite there yet. Note: This is not a recommended method for general hair removal!
Remember, just because you’re now the proud owner of a sharp knife doesn’t mean you’re ready to host your own cooking show or start a career in forest barbering. It’s still a tool, not a toy.
Alright, you’ve sharpened your knife, tested it, and now it’s time to maintain that beautiful edge. Because nothing says “I’m a seasoned camper” like a consistently sharp knife! Let’s learn how to maintain that “just-sharpened” status, shall we?
Maintaining Your Knife’s Sharpness
Congratulations on sharpening your camping knife! You’ve successfully avoided the “spoon incident” of ’22 (we still cringe thinking about it). But the job isn’t over yet. Like a well-trained pet or a bonsai tree, your knife needs regular care and attention to stay sharp.
Before the Trip
Sharpen your knife. Sounds obvious, right? But you’d be surprised how many campers forget this crucial step in the excitement of packing marshmallows and bug spray.
During the Trip
Clean your knife regularly, especially after using it. You wouldn’t leave your dishes dirty for days, right? (If you would, we won’t judge, but your knife might). Also, be mindful of what you’re cutting. Your knife is not a can opener, a rock hammer, or a makeshift tent peg.
After the Trip
Clean your knife thoroughly and dry it completely. This isn’t just about hygiene, but also about preventing rust. Even if you’re dead tired and smell like a combination of smoke, sweat, and bear repellent, take a moment to care for your knife.
Regularly honing your knife can also help maintain its sharpness. Think of it as a quick trip to the chiropractor for your knife, aligning all the microscopic bits of the edge.
Now, a word of caution: don’t turn into a knife-wielding maniac. It’s fantastic that you’re keeping your camping knife sharp and clean, but remember, it’s still a tool, not a light saber. Be responsible, be safe, and above all, be mindful of where you’re swinging that thing!
After all, nobody wants to be known as the “blade-slinging bandit of Big Pine campground”, right? Unless that’s your thing. In which case, we should probably have a different conversation. In the meantime, let’s move on to some other essential camping skills that you’ll need out there in the wilderness. Sharpening a knife is just the beginning.
More Than Just a Sharp Knife
So, you’ve become quite the whizz at sharpening your camping knife, haven’t you? We’re sure it’s now so sharp it could slice through the tension at a family reunion. But remember, camping involves more than just wielding a razor-sharp blade.
Starting a Fire: Knowing how to start a fire is crucial for cooking and warmth. Plus, it’s perfect for those campfire stories where you exaggerate your knife-sharpening skills just a little.
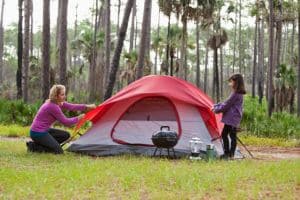
Pitching a Tent: Your knife might be sharp, but it’s not going to be much good against the rain if you can’t put up your tent. Unless you plan to use it to fashion a makeshift shelter from leaves and branches (spoiler alert: don’t).
Navigation Skills: Unless your sharpened knife also came with built-in GPS (we’d love to see that patent), you’ll need to know your way around a map and compass.
First Aid: Accidents happen, and while we hope your knife isn’t involved, knowing basic first aid is essential. And no, applying a band-aid doesn’t make you a qualified medic.
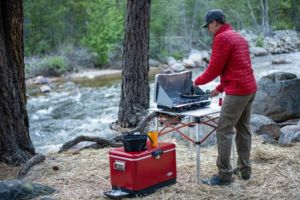
Cooking: You can have the sharpest knife in the world, but if you can’t open a can of beans or cook some simple camp food, it won’t do you much good. Unless you fancy a raw beans kind of dinner. But remember, we’re camping, not auditioning for a survival reality show.
Think of your sharp knife as just one tool in your camping toolbox. An important tool, mind you, but you wouldn’t build a house with just a hammer, right? (If you would, please send us a picture. We’re genuinely curious).
In the end, being a great camper is about more than just having a sharp knife. It’s about being prepared, adaptable, and keeping your cool when a raccoon steals your marshmallows. So get out there, sharpen your camping skills along with your knife, and make some unforgettable outdoor memories!
Conclusion
As our journey comes to an end, it’s time to pack up our metaphorical campsite and return to the hustle and bustle of normal life, where the only knives we need to sharpen are kitchen knives, and the only wildlife we encounter are cheeky squirrels in the backyard.
Remember, a sharp camping knife can truly be your best friend in the great outdoors. It helps you prepare food, craft shelter, and even kindle a fire (provided you’ve got some flint on hand). But more than that, a sharp knife gives you confidence and assurance – not in a “I can totally take on a bear” way, but in a “I am well prepared for this adventure” kind of way.
In this guide, we’ve walked you through the process of knife-sharpening, complete with more knife puns than you can shake a stick at (please, no actual stick shaking, it’s a figure of speech!). We’ve also covered the basics of knife care and some additional camping skills worth mastering.
Remember, a dull knife is not just an ineffective tool, it can also be a dangerous one. So, keep that blade sharp, and keep your wits about you. After all, camping is as much about enjoying nature as it is about staying safe and being prepared.
So, there you have it. The newbie’s guide to camping knife sharpening. May your knife always be sharp, your fire always warm, and your marshmallows never burnt (unless you’re one of those strange creatures who actually like them that way!).
So next time you’re camping, and someone compliments your knife’s sharpness, you can confidently reply, “Why, thank you. I did it myself, you know. Learned it from a somewhat humorous online guide that used an abnormal number of puns. Interested in a link?” Because nothing bonds campers together more than shared survival skills, bad jokes, and perfectly roasted marshmallows.
Happy sharpening, and even happier camping!
How to Sharpen a Camping Knife FAQs
To wrap things up, let’s tackle some frequently asked questions that pop up when it comes to sharpening camping knives. We’re all about spreading knowledge here, especially when it can help you avoid minor mishaps or major finger bandaging.
Q: Can I use a kitchen knife sharpener for my camping knife?
A: While it’s technically possible, a kitchen knife sharpener may not give you the best results for a camping knife, especially if it’s a different shape or size. The methods we’ve outlined are generally more effective for the diversity of camping knives.
Q: How often should I sharpen my camping knife?
A: This depends on how often you use it and what you use it for. But as a general rule, sharpening your knife before each camping trip is a good habit to get into.
Q: I’ve sharpened my knife, but it still seems dull. What am I doing wrong?
A: Sharpening a knife takes practice. You might need to adjust your technique or make sure you’re maintaining the correct angle against the stone. Keep practicing, and remember, it’s better to start off with light pressure and gradually increase.
Q: How can I tell if my knife is ‘too’ sharp?
A: A knife can never really be “too sharp” for its intended purpose. But if you find that your knife is cutting through materials too easily and uncontrollably, it might be time to practice safe knife handling.
Q: Is there a way to sharpen my knife if I don’t have a stone?
A: In a pinch, you can use the rough bottom of a ceramic mug or a similar surface. However, this should only be a last resort. For best results, invest in a good quality sharpening stone.
And there you have it! Some answers to your burning knife-sharpening questions. Remember, when it comes to sharpening your camping knife, practice makes perfect, and safety always comes first. So, put on some safety goggles, roll up your sleeves, and get ready to transform that dull camping knife into a masterpiece of sharpness!

Leave A Comment