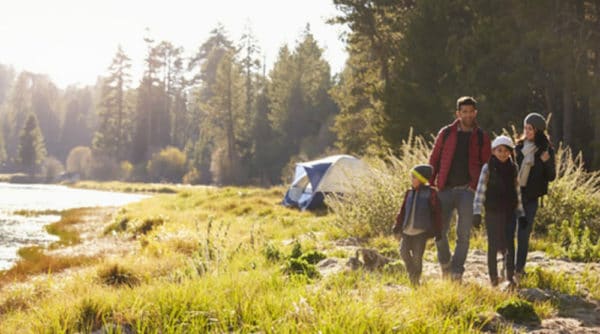
So you’ve decided to go on a family camping trip. That’s awesome, and we want to help. Planning a camping trip can seem daunting, but it doesn’t have to be. There is a lot to think about, but if you follow these 9 steps, it will make the entire process easier.
These steps will help you plan the basics as well as think about some of the less common items. Allowing you to be prepared and have a more enjoyable camping trip.

1. Determine when you want to go
I recommend starting your planning with the dates you want to go camping. Determining the dates will help you later in your planning. Based on your time frame, you might need different camping gear, need to reserve a campsite sooner, and it could eliminate some possible locations based on weather.
If you are new to camping I recommend camping during a time when the weather is the mildest. For many places, these times will fall during the summer. The weather tends to be the best, and it will prevent you from needing extra gear to deal with the cold.
That being said, if you live in a hotter location like Arizona, Spring and Fall will probably be your best bet.
So find a weekend or a few days that will work best for your next family camping trip. With your dates nailed down, we can move on to the next step.
2. Decide what type of camping you want to do
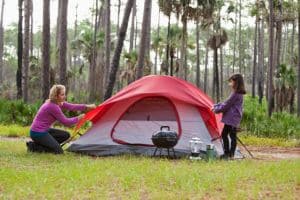
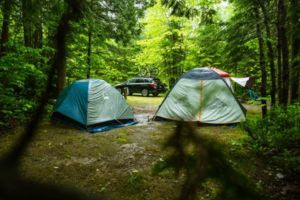
In step 2 of planning a camping trip, you now need to decide what type of camping you want to do. Will, you be tent camping, RVing, sleeping under the stars, primitive camping, or staying at a campground? This decision is important because it will dictate a lot of the gear that you will need to bring.
Tent camping
This is the iconic type of camping that many people think of when they think of camping. You sleep in a tent out in the woods. This will most likely be the type of camping you do if you are new to camping.
RV camping
This is camping with either a camping trailer or a full RV. This obviously requires a much larger investment as you will need to purchase a trailer or RV or rent one for the duration of your trip. If you are the type of person who enjoys more of the luxuries of home but still what to be out in nature, this might be the option for you.
Sleeping under the stars
This type of camping is very similar to tent camping, except you don’t sleep in a tent. I would only recommend this type of camping if you are fairly confident you will have good weather and the temperature will be relatively mild.
Regardless of how confident about the weather you are, you should still bring come backup equipment to ensure you don’t get soaked in the middle of the night. Something as simple as a tarp to put over you will often do the trick.
Primitive Camping
Primitive camping typically consists of finding an area to camp that is not designated as a campground. This is often away from anyone else and does not provide the conveniences that campgrounds do, like bathrooms, tables, electrical hookups, etc.
Primitive camping will require a little more preparation because you will need to plan for every aspect of your needs without relying on anything being prepared for you.
Campground Camping
This is probably the most popular type of camping because it is easy and it allows families to go camping with a few extra conveniences. If you don’t want to worry about having to search for a place that is good for camping, this is the type of camping for you. You don’t have to worry about where to set up your tent or if it will be a suitable location.
Not all campgrounds are the same. Some offer hookups like water and electricity, while others are called dry campgrounds and don’t offer any of those types of utilities. If you are camping in a hot climate or very humid, a campground with electrical hookups might be a good option so that you can bring a portable air conditioning unit.
3. Find a camping location
Finding the location for your camping trip is actually my favorite part. I really looking for new places to go and take my family. We’ve camped in campgrounds as well out in the middle of nowhere. I like them both, and they both offer different benefits but searching for a location is different for each.
Finding a campground
Finding a designated campground is actually pretty easy. There are a handful of ways that you can find campgrounds near you, or in the areas you would like to camp. I feel the following 3 ways are the easiest to find good campgrounds.
- Recreation.gov – Recreatioin.gov describes itself as “Recreation.gov is your gateway to discover America’s Outdoors and more! Recreation.gov is your one-stop-shop for trip planning, information sharing, and reservations brought to you by 12 federal Participating Partners.”
This is an awesome place to find campgrounds as well as to get more detailed information about each campground. The site provides an overview of the site, amenities, nearby activities, natural features, things to know before you go, pictures, directions, weather forecasts, and more. It is a very useful website. - Google Maps – Another great way to find campgrounds is through Google Maps. Google has done a really good job at cataloging most of the campgrounds around the US. You can simply search for “campgrounds near {location},” and it will pull up the campgrounds in that area. Once you find a campground you are interested in, you can Google that campground to learn more about it.
I like to google campgrounds I’ve never been to before to check out what other people are saying as well and find some pictures. I like to get a feel for the campgrounds to help me decide if the location would be good for our camping trip. - Ask Friends – The third way I recommend finding good campgrounds is to ask friends. If you ask around, you can often find people who’ve been to multiple campgrounds in your area and can give you recommendations. Additionally, you can even ask for the opinions of those who are on camping forms or in Facebook camping groups.
Finding a non-campground location
If you don’t want to stay in a campground but would prefer to simply find your own location in the wilderness, you can do that as well. This is often referred to as primitive camping, dispersed camping, or boondocking. Finding a good primitive camping location can be a little more difficult if you’ve never been to the area before.
There are 3 strategies I use in conjunction to find a new primitive camping location.
- Ask friends – I’ll typically ask around to see if anyone I know knows of any good primitive camping locations. You might be able to get a few recommendations from people you personally know, but your best bet is to ask online. Asking in camping groups on Facebook or camping forms will give you a larger reach of campers.
- Google Maps – When searching for primitive camping locations, Google Maps has become my best friend. I use Google Maps to search the areas that I want to camp in. The satellite view allows me to explore areas a little more. I will follow the dirt roads on the map to see if I can determine any locations that might be good.
You can even get an idea of the terrain on Google Maps by holding down the shift key, clicking, and then dragging your mouse down. This will shift the map into a 3D view and give you an idea of what the terrain is like. - Take a drive – Even after I’ve spoken with friends and checked out locations on Google Maps, when possible, I take a pre-campout drive to the location I’m thinking about to determine if it will work. I often will select 3-4 locations within about a 25-mile radius so that I have multiple options.
I don’t want to show up with all my gear just to find out the location I selected is not suitable for a campsite. Additionally, it’s a good idea to have multiple options in case your first option is already taken when you show up.
Remember to ensure you are allowed to camp in the location you have selected. I will often find locations in National Forests, which typically allow primitive camping. One of my favorite locations is actually on an Indian reservation. They do allow primitive camping, but you need a permit. Just ensure you do a little research to determine if you need any extra permits or permission.
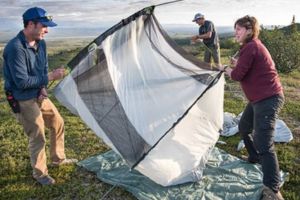
4. Evaluate your camping gear
The next step in planning a camping trip is to evaluate your gear and determine whether you have everything you need for your camping trip. The following areas of consideration are the main items you will need to consider but are not a complete list of everything you might need. We just want to make sure you have all the basics covered.
Shelter & Sleeping
Do you have everything that you need for your shelter and sleeping needs? The following items are the basic gear you should consider. Everything on this list is not required, but it might be something you want to consider.
- Camping Tent, Camping Trailer, RV
- Sleeping Bags
- Sleeping Pads
- Bed (cot, air mattress, mattress, padding, etc.)
- Pillows
- Rain protection (tent rain fly, extra tarps, ground tarp, etc.)
Making sure you sleep well is important because not sleeping well can ruin your entire trip. Ultimately, this is the one area that makes or breaks a camping trip for me. If I don’t sleep well, I’m gonna have a bad time.
Kitchen & Food Prep
Do you have everything you’ll need to cook, prepare, and store your food? We’ve found that if you don’t have all your kitchen needs thought through, you will inevitably forget something important. The following items will help you ensure you don’t miss any of the important aspects of your camp kitchen.
- Stove, Grill, Tools to cook over the fire
- Table for prep
- Coolers & ice for food storage
- Cooking Utensils
- Knives
- Spatchulas
- Cutting board
- Whisk
- Anything else needed for planned meals
- Pots & pans for planned meals
- Eating Utensils
- Plates & Bowles
- Cleanup (camp sink or another way to clean plates, bowls, pans, pots, etc.)
Relaxation & Comfort
I feel like items to make you more comfortable and help you relax are often overlooked. Camping is a great opportunity to relax and recharge, so don’t forget to bring the extra items that will help you do that. The following items are some of the things that help me relax. You should consider any items that would help you relax and be more comfortable.
- Campsite chairs
- Hammock or swing
- Shade tent/canopy
- Extra bedding & sleeping comforts (you can see more in-depth recommendations here)
- Books
- Music
Clothing
It is obvious that you need to bring clothing with you when camping but the main consideration here is to think about the weather you will be experiencing at your campsite. Will the weather be colder or warmer? Do you plan on getting rain, going swimming, going hiking, etc?
Go and look up the temperature at your campsite as your trip gets closer. You don’t want to show up with inadequate clothing. I typically plan for the weather I expect to experience but bring some precautionary clothes as well.
If I am expecting warmer weather, I will still bring a sweatshirt as well as at least 1 full set of warm clothes. The same goes for the reverse. If I am planning on cold weather, I still bring a pair of shorts. This ensures I have the clothing I need even if there is a day outside of what is expected.
Another piece I give people is for those camping with kids. We’ve learned that kids end up going through more clothes than you’d expect. We now bring extra clothes, shoes, and underwear for all our kids. This extra clothing has come in useful more often than not.
Hygiene & Cleanliness
How will you stay clean while camping? If you’re camping trip is only an overnighter, then this won’t be as much of a concern, but if it’s longer, this will be more important.
- System for washing your hands
- Shower setup (campsite might have this, or it might not)
- Bathroom setup (campgrounds often have bathrooms, but you’ll need to work out your own for primitive camping)
- Clothes washing station
Safety & Protection
You need to make sure you are prepared when it comes to your safety. You don’t want to be out in the middle of the woods and not be able to deal with at least a minor issue. These items will help you plan for some of those minor items, but they are not everything that you might need.
- First Aid Kit
- Bug Repellent
- Bear Spray
- Basic Medicine
- Sun Block
5. Plan out your food
Now that you know what kind of gear you will have, including your kitchen setup, you are ready to start planning out your meals. Your meals will need to be tailored around the food cooking capabilities and food storage capabilities you have.
We typically plan out a meal for every breakfast and dinner as well as about 50-75% of the lunches. We don’t plan every lunch because we will often have leftovers from dinner that we end up eating for lunch. Additionally, we will bring back up food items. For example, we will bring everything we need to make peanut butter and jelly sandwiches.
We try to keep our meals on the simple side so that it requires less work and prep time. Similarly, we will often prep a few meals before our camping trip and freeze them. We then simply have to pull it out of the cooler and warm it up. This allows us to save time on preparing the food while camping.
There are lots of great camping recipes to choose from. You can be as simple or as extravagant as you would like. It’s really up to you. If you need some camping recipe ideas, check out our camping recipes & food board on Pinterest.
An additional aspect to remember is that if you bring food that needs to be refrigerated, you will need to ensure you can keep it cold until you use it. There are lots of great camping coolers that will help you do this. We really like this RTIC cooler, but if those are a little too pricey, this IGLOO cooler or Coleman cooler is more affordable and is normally sufficient for multiple days.
No products found.
No products found.
No products found.
6. Calculate your water needs
Planning the correct amount of water to bring when camping can be difficult because it depends on the length of your trip, location, activities, humidity, etc. Each trip will be different, and you need to evaluate your needs for each trip. If it will be hot or you plan on more physical games, you will definitely need to bring more water.
When camping at an actively managed campground, there are often water spouts where you can refill water jugs. If that is the case, you won’t need to worry about calculating water needs as exactly. In these situations, we will typically bring 1 or 2 5-gallon water jugs to refill simply, so I don’t have to refill as often.
When going primitive camping, it will be more important that you bring enough water. We often plan about 1-1.5 gallons per person per day. This will cover our drinking, cooking, and kitchen cleaning needs. There are 5 of us in our family, so for a 3-day trip, we would bring 15 – 25 gallons. We typically bring a couple of 5-gallon water jugs as well as a few cases of water.
Additionally, if we want to shower while camping, we will bring a whole lot more water. We will typically bring a 55-gallon water barrel just for our showers. We can normally plan on the 55-gallon barrel of water lasting long enough for everyone to get one shower. If there is a location where we can easily refill that barrel, then we will only bring one, but if we can’t, then we might decide to bring 2 barrels.
Finally, once we figure out how much water we will bring, I will often through another case of water in the back of the truck just for precaution. I would rather have extra water than not enough.
When planning out the water you will bring it is always better to bring more than you need. If you will be camping near water, you could also bring a water filtration system as a backup just to be safe. There are a few affordable options on Amazon, like the LifeStraw and the Survivor Filter Pro.
No products found.
No products found.
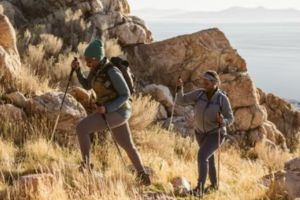
7. Plan out some activities
Now it’s time to plan out what you will actually be doing while camping. It is wise to plan out some activities, especially if you are camping with kids. On the other hand, if you are camping alone or as a couple and want to simply sit back and relax, that’s a great idea too.
Knowing what you will be doing while camping will also ensure that you bring everything you need. You don’t want to have planned to go fishing and then forgot to even bring fishing poles. Additionally, having activities planned for kids will make it easy to keep kids entertained. If you want some ideas for kids’ activities, check out our 10 Great Camping Activities for Kids article.
A few of the activities we often do while camping are:
- Hiking
- Fishing
- Playing Games
- Read Books
- Play Cards
- Go Swimming
- Playing Frisbee
There are also a lot of great outdoor/yard games on Amazon. These types of games offer a lot of entertainment and fun for the whole family. Here are a few of our favorites.
No products found.
No products found.
No products found.
No products found.
No products found.
No products found.
Whatever you want to do while you are camping, we recommend that you plan out those activities. This will allow you to create a more accurate camping checklist. I’ve found that the more I plan out, the easier it is to pack and not forget anything.
8. Create a checklist
Now that you have completed all the previous steps, it’s time to create your camping checklist. In reality, most of the hard work was already done in the previous steps. All you need to do is review the steps you’ve already gone through and start putting them into a list.
You can create this in any way you’d like; in Word, Excel, by hand, or any other way that works for you. The important part is that you take the time to create this checklist before it’s time to pack. If you give yourself adequate time to prepare the checklist, you will be less likely to forget anything.
We recommend that while you are planning a camping trip, you create your checklist in a way that you can reuse it for your next camping trip. We’ve found it very useful to be able to each checklist with our previous checklist. This makes the process a whole lot quicker as well as makes it easy to add new items to your list.
If you would like some help getting a jump start on your checklist, there are a handful of checklists you can find online. REI has a good checklist that will give you a really good start and cover most of the basics that you will need. I would recommend customizing it to your needs, but it is a good place to start.
Additionally, there are even a few camping prep lists you can buy on Amazon. These lists will go into more depth and offer you more lists that are tailored to the type of camping you will be doing.
No products found.
9. Pack, communicate, and have fun
Alright, it is now to pack, communicate, and have fun.
We like to begin our packing at least a day in advance to make sure we aren’t missing anything we need. Another important aspect of planning a family camping trip is communicating with friends and family. We always recommend telling others where and when you will be going on your camping trip.
This ensures that if anything was to happen to you while camping, there are others who know where you were headed and the time frame you planned on being gone.
Now that you’ve done all the preparation, it’s time to get out, go camping, and have fun!
Leave A Comment