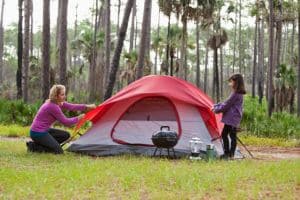
Getting out and going camping with your family is an awesome way to create lasting memories, but you want to make sure it doe end up being a good experience. Being ready for emergencies ensures it’s a stress-free experience when you know that you’re ready for whatever Mother Nature, or your children, can come up with. There are always first-aid essentials that you can easily garner from your bathroom, desk, and kitchen before heading out to the discount store for whatever else is needed.
The First-Aid Container
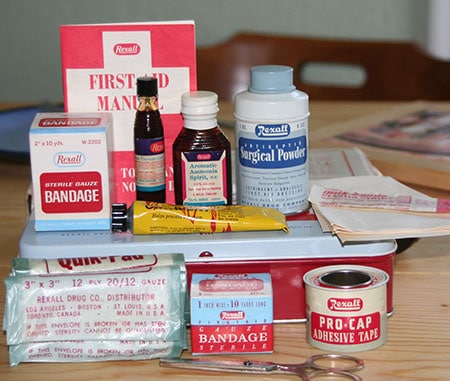
First and foremost, you will need the first aid kit box or bag. I’ve used a rectangular Tupperware container that was a waterproof two-tiered, sectioned container. I recommend something similar if you don’t already have one, or you could use a cheap toolbox or tackle box.
Now that you have your container, the next step is to determine what items are necessary for your trip. This will vary slightly pending on the location, but overall needs are basically the same.
Basic First Aid Essentials
I always make sure we have various-sized waterproof band-aids. A roll of gauze or gauze squares in varying sizes and a roll of medical-grade tape are needed as well as scissors. The scissors we use are the angled medical type, but a pair of sharpened children’s scissors or cuticle scissors work well.
In addition to the scissors, I have 2 pairs of tweezers, both the angled edge and the needle nose or pointy end tweezers. I recently got a pair of angled-edge tweezers that have a light on it as well, so the awkwardness of holding a flashlight in the mouth or by someone else is eliminated.
A small magnifying glass is also a useful tool. It’s great for small splinters, cactus spines, and possible pieces of matter that seem to find their way under your skin for no reason at all.
Cotton swabs are always part of our first aid kit. I put them in a plastic, resealable bag and replenish them when needed.
The scissors, tweezers, and magnifying glass can be placed together in their own section along with a pair of nail clippers, a nail file, and nail cleaner. Nail clippers that look like a pair of pliers are always handy for a hangnail or an ingrown nail that you weren’t aware you had until you wore those new hiking boots. The nail files that I keep in my kit include both the sandpaper type and the metal file.
A regular 12”x12” size handkerchief should be included just in case you need to improvise for a head wound or wrap around a hand when there isn’t enough gauze. I have two different size cloth triangles for slings, both adult size and child size.
A few tongue depressors are necessary for any possible broken fingers, and don’t forget the medical tape.
Additional Items
So now you have your basic DIY first aid kit tools, but I always included a little bit more because, well, I have three children, and they loved to climb trees, jump rocks, and there are often no bathroom facilities where we camp.
I always include triple antibiotic cream, a whistle, alcohol wipes in their own individual packets, Tylenol or Aleve, and witch hazel. I put the witch hazel in a travel-size bottle and also have hydrogen peroxide handy.
Keep in mind that hydrogen peroxide doesn’t know the difference between healthy skin cells and those with bacteria on them so if using this for cleaning, be sure you don’t leave it on too long before wiping or rinsing off.
Soap and water are the best bet for cleaning a wound, but sometimes they are just a bit too big for this to be feasible.
Hand sanitizer is great to add in just in case the alcohol wipes get lost or dry out. I do have oatmeal soap in our kit and the required calamine lotion for poison oak that always seems to find its way onto at least one person during each trip.
Speaking of itching, another great item that we take with us is either Thermacell mosquito repellent or citronella candles to keep mosquitoes away as well as sprays with picaridin, PMD or IR3535 insecticide. DEET can be used safely on just about everyone over 6 months of age unless there are known allergies.
Keep it in the first aid kit just in case you are in a mosquito breeding ground. These areas tend to be lakes or where there is a lot of standing water. DEET should be used in lower concentrations for younger children and if using a spray, be sure to spray onto the palm of your hands and then apply to the skin to minimize any inhalation issues.
Sunscreen is a necessity for everyone, and aloe for sunburns. Always use the smaller, travel-size bottles for creams or liquids such as sunscreen or anti-itch gels, and be sure to keep them in plastic bags as elevation can make some containers swell. This helps if they are accidentally opened (not all caps are put on right), then they won’t leak everywhere.
Chapstick should be included in your kit for several reasons; this can be used for sunburns, to soothe chapped skin from the elements and scrapes, and even as sunscreen when a bit is rubbed on the palms and then applied to the face and neck.
Chapstick can even be an emergency candle when a cotton swab is dabbed into the stick and covered with the salve, and then lit. A temporary mini torch but a light nonetheless. Keep this in a snack-sized resealable bag because it will leak when temps are high.
A snake bite kit is always included. A small knife, a multi-use tool great for removing fishing hooks from fingers, and waterproof wooden matches were in our first-aid kit, along with a pair of boot shoelaces, a couple of large trash bags, and a couple of smaller trash bags.
Add-Ons for Peace of Mind
Don’t forget the small ice pack for your DIY first aid kit. Get a few of these instant ice packs that get cold as you bend them in half. Also, cream-like Ben-gay is good to have just in case you have to deal with sore muscles.
I will also add other items like a straw, a pen, a pad of paper, duct tape, a Sharpie pen, as well as mule skin for blisters.
Our homemade family first-aid kit also includes a small packet of wipes. These are handy just in case they are needed for some cleanup. Lastly, nitrile gloves should be included. Although, if you don’t have any at home, it’s okay; just pick up some of the thin food server gloves. They’ll work in a pinch.
Buying a First Aid Kit
A DIY First Aid Kit is great because it allows you to personalize it to your needs. You are able to ensure you will have what to need to cover your family and yourself for most of your first aid needs. Now, if you decide you don’t want to build your own or don’t have the time, you can always choose to buy a first aid kit. We recommend the Surviveware Large First Aid Kit, but there are a lot of good options that will fit your needs. Here are a few that we feel are good options for most family campers.
[lasso box=”B07CQ8JVC7″ price=”hide” tracking_id=”tnt_diy-first-aid-kit-20″ link_id=”407″ id=”3836″ ref=”surviveware-survival-first-aid-kit-labeled-compartments-bonus-mini-kit-for-cars-and-outdoor-preparedness-large”]
[lasso box=”B002DQY776″ price=”hide” tracking_id=”tnt_diy-first-aid-kit-20″ link_id=”408″ id=”3742″ ref=”first-aid-kit-hard-red-case-326-pieces-exceeds-osha-and-ansi-guidelines-100-people-office-home-car-school-emergency-survival-camping-hunting-and-sports”]
[lasso box=”B000069EYA” price=”hide” tracking_id=”tnt_diy-first-aid-kit-20″ link_id=”409″ id=”3743″ ref=”first-aid-only-299-pieces-all-purpose-first-aid-emergency-kit-fao-442″]
Build Your Own DIY First Aid Kit
It might sound like a lot to build your own first aid kit, but really, the essentials are most likely already in your home. Putting them together in a waterproof container keeps everything neat, clean, and in one place. Your DIY First-Aid kit is then easily accessible, compact, recognized by family members, and personalized to your needs.
Leave A Comment